According to conspiracy theorists, Solar Warden is an ultra-secret project that maintains a fleet (or several fleets) of spaceships that are operating within our solar system. Some say they’re defending us against alien threats.
This is the Development Blog of Dan Tracy's Indie Title - Solar Warden. Follow him as he chronicles his solo development of his Unreal 4 title.
I'm very excited to have now gone through the Unreal Marketplace submission process. Was actually pretty simple. I'm looking forward now to making some more stuff for the Marketplace just to expand on things to sell.
This last week I've been working on setting up the Dissolve Gradients for UE4 marketplace. Since this was something I wanted and needed for Solar Warden for the Damage Shaders on the hull of the ship (and for later effects like Shield Destruction).
I figured that other projects would be able to utilize this as well. As of yesterday, I've submitted these over to Unreal Martketplace and now waiting to hear back.
Description
Create Dissolving or blending materials from these master material templates. Include any color you wish to the dissolving gradient by changing the parameters on the fly. Noise Maps can either be computational for high quality, or put into a noise map texture to save on performance. Noise maps can also be animated. Examples include melting metal, corrosive acid, dissolving Water/Bubbles, even Ice and Lavastone material examples included. Perfect for Damage Shaders, Weapons/Spells, Enviroments, VFX, etc.
Technical
Number of Materials:
- 5 Material Functions
- 3 Dissolve Master Materials
- 1 Basic PBR Material for reference
- 30 Dissolve Instanced Materials
Do Materials derive from a Master Material with instances as variation: (Yes/No):
- Yes
Number of Textures:
- 19
Texture Resolution (complete list):
- Noise Maps are 1024x1024
- Hull textures are 1024x1024
- Lava Stone textures are 2048x2048
Engine Compatibility:
- UE 4.13 and later
Intended Platform:
- Windows, Mac, Consoles
Platforms Tested:
- Windows (Win 7x64)
Documentation Included: (Yes\No)
- No; Material Parameters are self descriptive
Important\Additional Notes:
- Highly-customizable
- Noise Maps can either be computational or set as a texture to save on performance
- Gradients do not require textures and can be switched on the fly
- Possible Animated shader
- Swap out your PBR textures in Material Instance
- Dissolve can also be used to blend between PBR Textures.
Grubs and other Aliens
Along with all the weapons and backend updates this month. The Aliens are progressing nicely.
First, we have the Grub that has had it's Fusion Beam weapon plugged in.
Alien Fusion Beam
In this video, the Grub spawns from a different Asteroid and fires a powerful beam at the player. This demonstrates that any of the new weapons created can also be applied to the AI as well. Along with the Fusion Beam on the Grub, the Player in this video is equipped with Blast Cannons! These cannons are an automatic shotgun that are great at close range. Also for added effect, I've opened up firing mechanics to have a setup for camera shake to give more feedback to the Player when they are firing powerful weapons.
Further to the Grub, we have created some concept art to be forwarded onto 3D artists to make a high end version.
Additionally, some Whitebox has begun with some of the additional Alien enemies. Here is one of them
Exploder Whitebox
This creature has expandable sacks that are filled with a gaseous compound that can detonate with a high yield of explosive power. These creatures will attempt to fly into the Player and detonate within rage of their explosive blast range to deal massive damage to the Player. They are usually found in swarms.
Modular Weapons! - This back end writing on the weapon system has allowed me to split the weapons into the following modules for me to play with.
Charge Modes
Fire Modes
Shot Modes
The reason for making this whole system was mainly to allow me to create new weapons easily and efficiently. So what do these modules open up? Well, here's what I can do now with each of them.
Charge Modes
None
Press and Hold
Fire and Forget (Press once and charge happens automatically)
Fire Modes
Single (Semi-auto)
Burst (Length of shooting time on Beam)
Full Automatic (Continuous Shooting with Beam)
Shot Modes
Single Shot
Shotgun (X projectiles)
Beam
Allowing for a mix and match of any of these above + any projectile I wish, this allows me to make the bulk of common or unique weapons out there with these simple modes. For example I made a few here on the Player's Ship - Ion Beam and Burst Fire Missiles....
Ion Beam and Burst Fire Missiles
This system doesn't just work on the Player, but also the AI as well! In the next update, I'll show this working on the Grub to have him barf out a Fusion beam at the Player!
(reference)
But it doesn't stop here. Tons more weapons I'm planning on making...
Blast Cannon (Automatic Shotgun)
Gauss Cannon (Fire and Forget Sniper Rifle)
Prismatic Laser (Beam Shotgun)
Ballistic Gatling (Press and Hold Charge + Automatic shooting)
Laser Gatling (Press and Hold Charge + Automatic Beam)
Heavy Laser (Press and Hold Charge + Continuous Beam)
Fixed Time Step Rates - So one of the latest discoveries that I really should have thought about was to apply a Fixed Timestep to anything that measures values that are piped through a tickrate. What I mean by that is anything that's relying on Tick updates (updates per frame) like TurnRates, Speed changes, etc.
Since latest testing and optimizations allowed me to achieve FPS heights of over 300 in dead areas and perhaps <60 FPS in some extreme PFX/Light heavy areas, this wild variation in FPS made it very noticeable that Updates per frame were also being affected quite drastically. Relying on Frames when they aren't consistent will make those rate play differently both on the upper end or lower end.
FPS Difference in turn rate
As you can see in the quick video above, you can see the difference in turn rate between an unlimited FPS (turning super fast), vs a limited frame rate of 30 FPS (turning much slower). Easily made sense when you think about it. If the game only has 30 Frames per Second to process an X turn rate, then it would only update 30 times per second vs the 200+ FPS I was getting.
As you can imagine, alot of people might be thinking "Well, force limit your FPS to 30-60 and everything will run just fine", and this is perfectly acceptable to use when doing console development (Xbox, Playstation, etc.), but I refuse to limit my FPS when playing. Personally I would rather have an unlimited FPS so I might enjoy a smoother experience in my titles so there had to be a way around this. The answer that comes with this is to create frame rate independent comparisons with my rates to my Delta Time of the frame.
What this has allowed me to do is now allow for any FrameRate to occur in the game while making sure my values of things like "TurnRates" can remain at a particular speed I want for the Player to feel, eliminating FPS as either a Play advantage or disadvantage.
It's fun to look back and compare where you've been to where you are now.
While setting up Blogger and pulling over my 50+ Development updates of old, I realized how powerful it is to keep track of all of this. From my old days of Developing for Mech Warrior: Living Legends and heading that project, I already knew how important keeping up with those monthly news letters were for the fan base. However, Solar Warden is a completely different beast. Since I'm currently doing 100% of the work, it's really easy to just lose myself in just creating and developing without the need to document or chronicle the work being done, or write down about the lessons learned. Alot of times I felt myself digging deep into developing a feature and not really getting anywhere and it gets hard to come back to the same problem every day to see that problem that once defeat you waiting for you... watching you... However, I'm super glad I kept a small journal alive and made sure to write up the progress of each long work session (even if they turned out to be 2-3am). It really helped to remind myself of the progress I've made and a little bit of a confidence boost to push through the current problem and move onto the next.
Much like a hiker reaching lookout points and being able to see back down the mountain from which they came, I feel a huge sense of a accomplishment seeing just how much the project has changed and improved since my first builds in Unreal and also how much I've learned just by figuring all this stuff out on my own. I feel more encouraged than ever to spur on and reach the top of this mountain and bring Solar Warden to it's gold standard (to which I plan to push for perhaps a tentative February release. Don't quote me here :) ).
As a fun aside, I took the very first screenshot of development and made a comparative screenshot with my recent build just to see the difference between March and October. After standing back and seeing the difference, I must admit I giggled a little bit. But see for yourself.
I'd also like to take this time to tell anyone looking at doing game development to remind them that these journals are super important. Maybe you don't want to share them publicly, and that's totally fine, but build on and keep the discipline of writing development journals for yourself. Why? The reason is simple. It's always great to look back and remind yourself how far you've come and what you did. We Game Developers craft experiences, and an Experience is the sum of it's parts. It's a great pick-me-up and reminder of what these parts once were and where you've taken it from there. Also who knows, you may one day pass this knowledge onto other people that will greatly appreciate it and apply it to their projects in the future.
Testing out Blogger. This might be my new page for all of my updates regarding development posts until I can get a sight up and running.
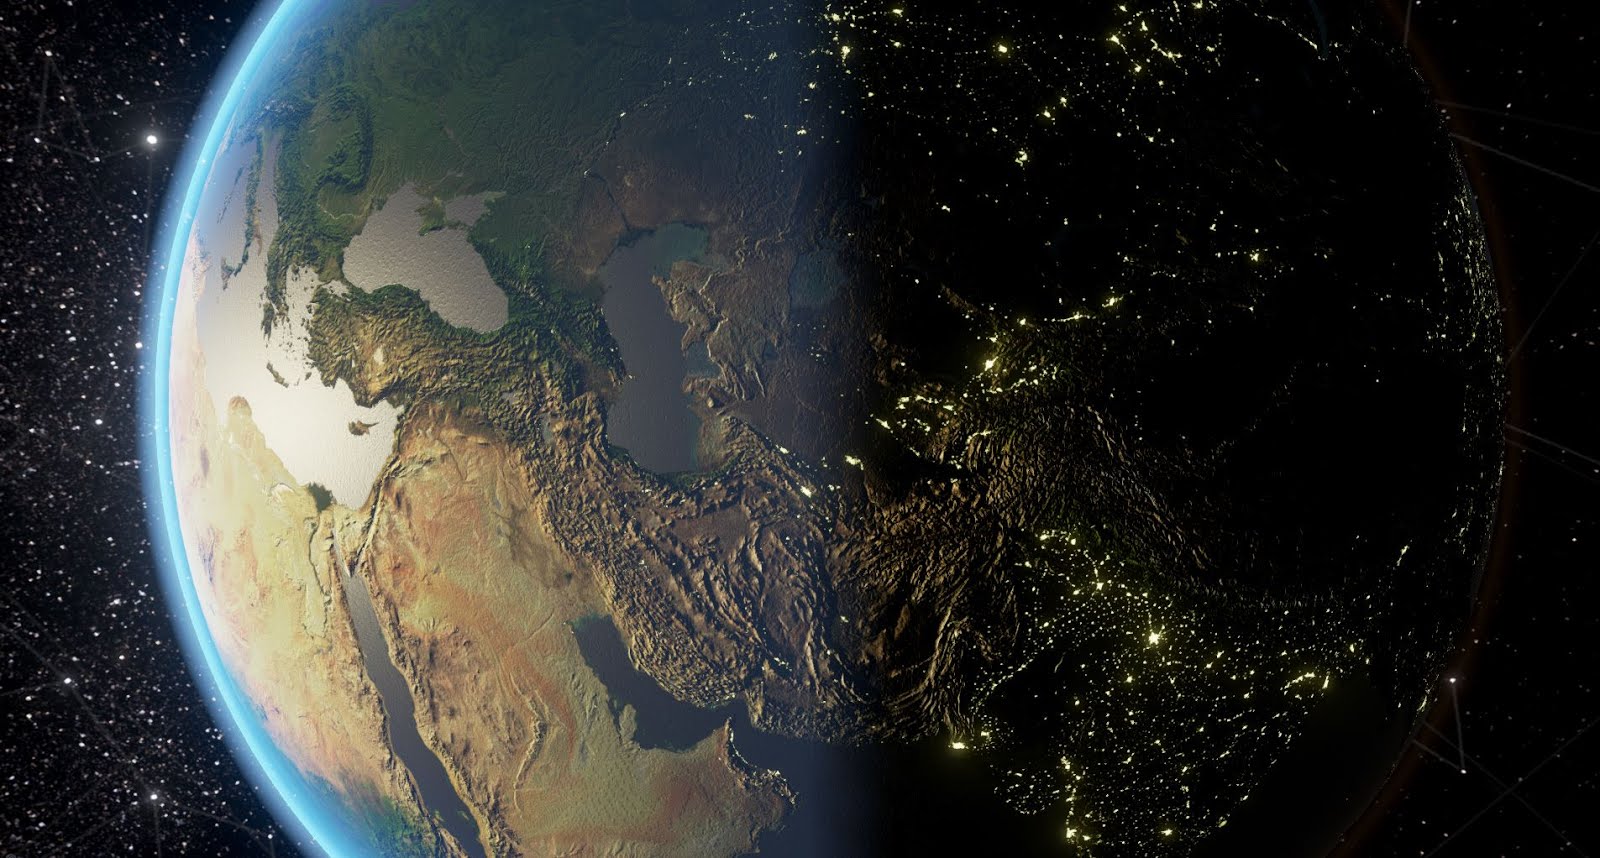
Lately in Solar Warden development, I've been making some tweaks to alot of the lighting within the Level and working on bringing back in the Atmospheric fog.
This brought much more atmosphere (no pun intended) to the level without it being dead and a black night. With that, I also added in a much needed lens flare texture that overlays on the sun. This combined with a slight yellow tinted atmosphere fog really makes the space pop alot more. See the image below.
Progress Update 10/4/2016:
- Fucking Lights! Cast Shadows SPENSIVE! So I had about like 10+ lights on the ship and wow I didn't realize how expensive shadow casting in Unreal is. Then again, they aren't differed lights and are probably full Dynamic. So what ever :D
-- I changed these lights all over to non-shadow casting, and went from ~26 FPS back to 114 FPS. LOL omg. My game runs too smooth
-- A side effect currently with the FPS being super fucking amazing shit hot or terrible (114 FPS or <30 FPS) is that Ticks are frame dependent. Herp-derp I guess that's obvious. However, what kinda isn't is that all the tick functions I do are also frame dependent. Meaning that all the functions that run off tick will run super fast with high frame rate or super slow with low frame rate.
- Found this Cvar "t.MaxFPS 60" to lock the FPS
-- I like the idea to push for a 60 FPS gameplay
TODO: Setup a fixed timestep for Tick Functions to 60fps assumption.
- Got Space Particles working. These are the ambient space dirt particles to give the impression that the player is traveling in different directions.
TODO: Video or GIF showing
- Tweaked up intensity of Milkyway (looks better)
- Changed cubemap of skylight to grey again for better low light visibility.
TODO: Tweak again and get a better cube map?
NOTE: Random screenshot before closing out for the night. It's a good sign that on a random frame of gameplay is screenshot worthy.
Progress Update 9/30/2016:
- Ran into a bug with Aim Offset when trying to setup the lasers
-- This might be the cause of missing shots at extreme angles :( TODO: Fix Aim Offset
Progress Update 10/2/2016:
- Fixed with Aim Offset being done now in world space as was being done in the Debuging of the raycast. I have since moved it to the weapons since the Aim Offset Relative was added with the Ship's rotation relative to camera which caused further offset than what I wanted BUG: beams render a frame behind and don't use local space :(
Progress Update 10/3/2016:
- Workaround for Beam rendering a frame behind. Instead of using Unreal Particle Beams, I'm doing the MWLL trick of spawning geometry and then stretching it along one axis to achieve the effect.
-- Down side is I don't get the nice gradient of the laser beam material since I'm using a cylinder. I might consider switching back to a plane and then rotate it to camera like Beams do (isn't this just recreating beams though?)
--- I made a kind of work around for this too where I have tripled up the "inner white cores" within the outter cylinder and then had an opacity drop on the White Core material. This overlap on the differently scaled cores gives an illusion of a gradient being there for the laser, but might be expensive for the long run with alot of overlapping transparency...
TODO: Profile Lasers Transparency
TODO: Might eventually go back to Beams and look at how I can set these up with Simulated actors since the PFX on beams is much easier to make cooler beams than to do it with the geo.
Progress Update 9/30/2016:
Been really falling behind on these. I'll get back to this on the weekend. In the mean time.
- Birthday vacation
- Been playing around with FL Studios for songs (Placeholder ones??)
- Setting up lighting on the Player's Ship
Progress Update 9/19/2016:
- Been working on getting my Laser Beam working from my Unreal Marketplace project. WIP weapon setup
- Got a terrible placeholder material on the Grub so he can look similar to his younger brother the Spore.
TODO: Bake real normal map on him and get a better texture. Maybe look at getting Substance Designer/Painter?
Progress Update 9/18/2016:
- Been working on some new Alien concept models and came up with the "Grub" here.
-- This guy will be barfing out a Fusion Beam Laser after I get the weapons working the way I want.
Progress Update 9/5/2016:
- PDI Contracts and Hangar WIP
Contracts Menu is where different countries offer Unlocks, Money, Favor, or Technology in exchange for the Player to do a Mission or build something. Below is a proof of concept layout of how I want it to look.
The Hangar is the menu to show the Player's current ship in their current docking port around earth. They will be able to manage their ship's loadout and will be able to swap equipment here.
Progress Update 9/2/2016:
- WIP PDI with Defense Grid.
TODO: Omg... need to setup 240 individual grid points :(
TODO: Oct 10 - Will need to revisit this since I've changed the lighting in the level now and this really isn't visible much anymore.
NOTES: This texture method overlapping works!
So I dunno, I don't quite dig this kind of setup. I'm trying to show a "Defense Grid" from this kind of view to should which areas have been covered by either Ground Telescopes or by Satellites. I'm not really sure if this is readable yet. I might have to come up with something else.
Progress Update 9/1/2016:
- 4.13 came out and I setup my BlendShader to use the UV output from LineTrace. This can be used for lasers shooting a surface.
Progress Update 8/27/2016:
- WIP PDI Overview 2
-- Icons and the like TODO: Make News Ticker run across whole bottom TODO: Shrink Earth population and isolate it a bit more
Progress Update 8/27/2016:
- WIP PDI Overview (UMG is taking awhile....)
I'm finding UMG really slow to work with. Probably because it's almost like web designing in HTML... well maybe not that bad. I just find that everthing is so maticulous to the point where it feels tedious. Perhaps I'm just spending too much time on it and not coming back to the fun stuff in development.
However, it is fun to look back onto UMG and see it come together with that I've outlined in the doc :)
- Cleaned up Geo for Zenith Station
-- Create BP for Zenith Station with Name Marker.
Progress Update 8/16/2016:
- WIP 3D CityMarkers - Look much better, but need to find a better way to setup the light shafts
TODO: Animations for idle, hover, selection, return to idle.
- WIP Asteroid Impact 3D Markers - Look interesting, but not quite digging it. Will need to fiddle around with them.
Progress Update 8/14/2016:
- WIP PDI design doc to be used as the blueprints for the PDI layout
Because I thought it was important to keep some documentation of what I wanted for the PDI and how the player will interact with it.
- Also started working on the 3D version of the city markers to improve the visuals TODO: Create 3D markers for Asteroid Impacts
Unrelated TODO: I also want to revisit the Player's flight HUD and create markers on the HUD that show speed/rotation.
Mockup:
Progress Update 8/12/2016:
Would've posted earlier but was bogged down by business crap
- Normal Map Place on Earth which works for both Real and PDI versions
- Also tweaked cities to glow a little more with bloom and also tweaked the colour to be more deeper orange
Progress Update 8/10/2016:
- WIP PDI Intro 3
-- Lots of work with Ground texture multiplied when PDI is on
-- Country borders with some replaceme label
-- New animated texture for City Markers
-- Wireframe shrank to be showing only water
-- Dither Opacity on Main Ground texture using Spec and Opacity Mask to show ground and half ocean
-- Added Basic Zoom function TODO: Need Displacement or Normal map for the Planet to bring out the detail more
Progress Update 7/31/2016:
- WIP PDI Intro 2
-- Fixed up some rotational issues with the initial planet intro to PDI interface
-- Found out about the Possession before Camera Blend bug
-- Added Continent outlines
-- Added Wireframe Scanning
-- Setup basic PDI pawn to rotate around Earth
-- Created Citymarker UI actors to be placed on the planet
Progress Update 7/25/2016:
- WIP MagDrive
-- Finished up the basic Stages for MagDrive Logic
-- Have the MagDrive slow you down when you reach the Waypoint
-- Have some Placeholder particle Effects for SPPPPEEEEEEEDDDDD
TODO: ReplaceMe Particles for MagDrive travel
TODO: Allow for Cancel of MagDrive (any early out - User Triggered, Collision (detection?), etc)
TODO: Remove Debug Info and place into Ship HUD for Messages
TODO: Better logic on displaying waypoints. Should Waypoints be seen if behind Earth??Created logic to hide them
Progress Update 7/24/2016:
- Added Waypoint Targeting with "T"
-- Also have a Collision Check so you don't crash into planets and the like
- Added MagDrive WIP on "Z"
NOTE: Doesn't look like much, but I have a staged acceleration that propels you to 100000 max speed.
TODO: Effects for MagDrive (Screen space effects with dust particulate fling by really fast, White Engine Colour for Mag Drive, Maybe a "shield" like effect at the front of the ship)
TODO: Also need to finish up the MagDrive feature to have MagDrive kick you out when you reach your destination and also allow for user canceling with pressing "Z" again.
Progress Update 7/23/2016:
- Fixed up Earth to cast a shadow at a very low resolution since it wasn't casting a Shadow already and the lighting was casting onto objects behind the Earth.
- Did some minor tweaks to bring back Eye Adaption a bit - makes the darkside of the Earth look better with a better glow on the cities.
-- Some Eye adaption might be too strong in the darker areas since the stars get blown out pretty bad. TODO: More Eye Adaption tuning Sept 2016: I've tossed most of the Eye Adaption since it really blew out alot of lighting (like engines when boosting) which looked terrible IMO
Progress Update 7/20/2016:
- WIP with Crater decal spawning after hitting earth and expanding out
TODO: New Particle Effect and try to lessen the lag spike upon impact on CPU Progress Update 7/21/2016:
- Been having loads of problems with Bad RAM which has stalled alot of work. Had to go through and check each stick on by one with Memtest86. Found the stick and tossed it. Didn't feel like dealing with Fry's so I bought new sticks from Amazon. Fortunately it was only one stick that was bad so will be back to 32 gigs today.
- Because of the RAM fuckery, my 4.11 build was also fucked. Fortunately it was a good time to update with 4.12 so I updated the build to that and committing now.
- So after the 4.12 update, I knew something would be fucked with the shaders somewhere. Fortunately it was "relatively" easy to find. It was the Cloud Translucency vs the shadows that I was drawing. The Shadows were always displaying on top of the clouds for some reason, and wasn't sorting it properly within the depth buffer. To fix this, I made a Cloud Shadow stand alone actor that on the Construction script I had it set the Translucent Sort Priority to -1 https://docs.unrealengine.com/latest/INT/BlueprintAPI/Rendering/SetTranslucentSortPriority/index.html
NOTE: I also noticed too that when updating to 4.12 that alot of the post processing was back and I kinda liked it (except for the crazy eye adaption). So I might go back and tune those settings a bit so it really bring out the most of the environments
Progress Update 7/12/2016:
- Was looking at trying to setup the Decals with the Meteor Impact today, but got sidetracked with a very noticeable problem on the Crater Decals... the Projected decals leave a terrible sampling tare when viewed at a distance....
-- Fixed this with a clever setup of having a Planar Object be placed into the actor and then have the material do a distance check and if Greater than scale/distance given, then this Plane (with duplicated material of the crater) is then drawn.
Success! I R Better than U Decal Renderer.... Edit: I should note that this was pre 4.13 where they now have the new Mesh decals. I should take a look at these one day.
TODO: Still need to finish impact of Meteor into Earth
TODO: I want to look at a GPU particle that sprays up a shit ton of debris and scales out. Should I place the crater decal during or after the effect has played? Not sure yet, need to experiment.
NOTE: Side note, apparently Meteors can cause craters that are on average 10-15 times the size of the object that hits Earth. https://answers.yahoo.com/question/index?qid=20140723054904AAotA9P
For Gameplay (and in the screenshots above) I did a rough 3-5 times bigger seems more than enough. But who knows, maybe wanna go big to wipe out countries. Will need to experiment
NOTE: On that above note, I'll need a way to define borders on the planet and check to see if they have Crater decal overlap... Perhaps use cities as the main hub??
EG.
Progress Update 7/8/2016:
Big update - Damage!!!
- Setup Dissolve to blend with damage and do a cool blast out effect when hit
-- This effect also fades over time when not hit
- Setup some basic Camera Shake when hit
- Setup some placeholder death event/effects
- Setup basic Game Over screen
Video Below
TODO: There's a crash on Quit/Loading back to main menu. Needs fixing I don't think this is occurring anymore since my update to 4.13
Progress Update 7/7/2016:
- Setup a basic Healthbar in the bottom middle and anchored to bottom
- Setup visual component to Damage to ship with the blending material made previously. TODO: I want to explore options with the 2nd material underneath the Hull of the ship, since seeing holes in the ship is cool, but there's no structure under it. I'll see if the best way is to make a quick lattice mesh with a "burnt" material looks good underneath. Maybe blend this one as well?? TODO: Setup Death state and explosion for the ship TODO: Game Over Menu Screen
TODO: Save/Load
TODO: Asteroid Rounds
- Changed the explosion on Spore Cannon to use the Alien Reveal particle, but smaller, however large enough so the player can see it impacting the ship
TODO: I was trying to setup the Particles to "Attach" to the hit location when impact occurs, but I can't seem to get them to stick. Maybe I'll try to spawn an actor so I can attach the Actor rather than a Particle Component from DefaultProjectile.
Progress Update 7/6/2016:
- Setup new Main Thruster effects on the ship
-- Normal Thrust based on Applied Speed Output
-- Afterburner changes colour and scale a bit of thrust
Video here
Progress Update 7/5/2016:
Didn't write this before, but will now
- Got finished with new Ship model
- Got new Crosshair setup for ship
- Fixed the DPI issues like listed above
- Found out about performance drop about new PIE and mouse spamming in that mode. This pushed me to register the owner of the ships and Alien weapons on Construct.
RANT BEGIN
So WTF! This DPI unit scaling on Widget is really annoying https://docs.unrealengine.com/latest/INT/Engine/UMG/HowTo/ScalingUI/
I found that by default most 720p and 1080p res (and other rez) have DPI scaling that's different than 1!! WHY?? I guess this is to scale icons so they they aren't fucking ginormous on different resolution screens.
Basically I was running into the issue of the AimOffset and the Crosshair UI not lining up for awhile. I didn't really think much about this because I thought I was down rezzing from the original 1080p, but NOOOO, this actually has a DPI scale which meant that every rez that wasn't matched to DPI 1 scale that the CrossHair UI Offset was WRONG AND WEAPONS ALWAYS MISSED WHERE YOU WERE AIMING AT WHEN NOT AIMING AT 0,0!!! GAAAHHH!!!
Anyhow, with some debugging with the AimOffset Billboard and RayTracing from the weapons, I was able to figure this out and match them properly to the rez of the game again. Man, I hate these kinds of bugs that take forever but the solution is super simple.
Unfortunately, this means more time needed to fuck with the HUD sizes again.... Ah welll... /END RANT